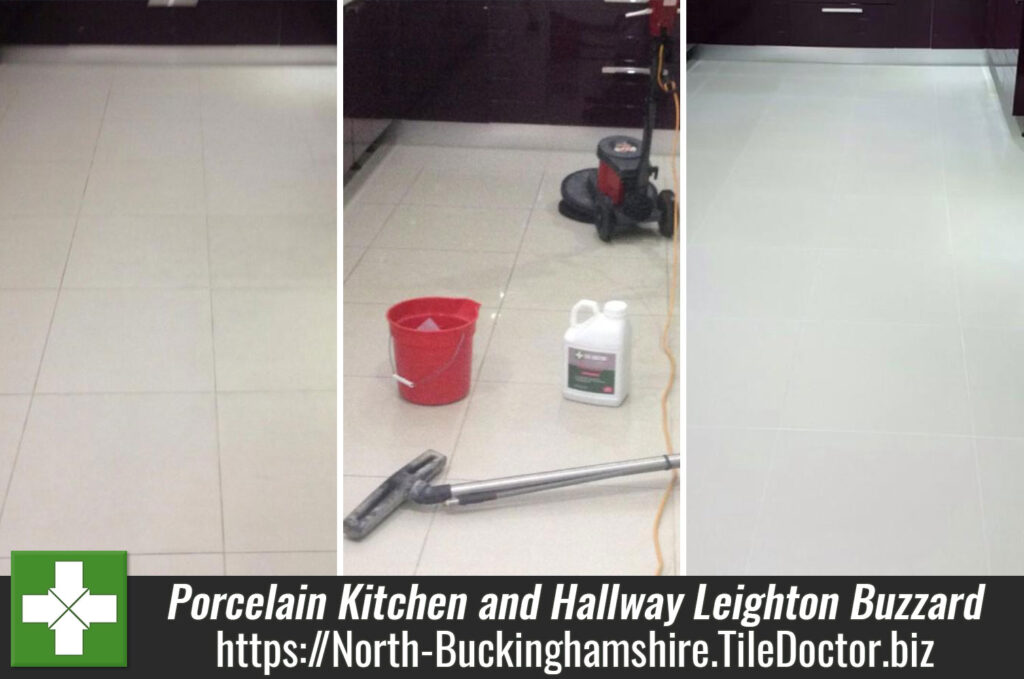
Grout is an incredibly important feature of tiled floors, not just from a structural perspective, but from an aesthetic perspective too. If the grout lines are dirty and stained, it ruins the overall look of the floor. It’s important to try and keep them clean, but with grout being rough in nature it does attract dirt and if left un-checked it can easily get to the point where cleaning becomes very difficult.
A good case in point was this Porcelain tiled kitchen floor at a property in the historic university town of Buckingham. The floor had been installed approximately eight years prior and while during this time the property owner had made the best efforts to keep the tiles clean, the dirt and grime had begun to build up – particularly in the grout lines.
I visited the property to see what could be done, starting with an initial test clean with a strong solution of our high alkaline cleaner, Tile Doctor Pro Clean. The tiles came up beautifully, but due to the extreme porosity of the grout, some of the dirt had been absorbed too deeply into the grout to get it completely clean.

These products not only restore a clean and uniform appearance to the grout, they also provide a waterproof barrier which prevents any dirt and grime from penetrating the grout in the future. The recolouring process is a relatively quick, affordable, and a tidy alternative to re-grouting.
Cleaning Porcelain Tiles and Grout
Impressed by the efficiency of the Pro Clean product and the cleanliness of the test patch, the customer requested that we go ahead and deep clean the tiles and re-colour the grout.
The work took two days. On the first day, we deep cleaned all the tiles and grout using the same strong solution of Pro-Clean. The solution was applied to the floor and left to dwell for approximately ten minutes and from there I used a rotary machine fitted with a black scrubbing pad to loosen the soil from the tiles.
Once the floor had been thoroughly scrubbed, I used our wet pick up and rinsing machine to remove all the dirty water, and rinse the floor with clean water.

This process serves two purposes: firstly, it helps to remove as much dirt as possible from the grout lines prior to re-colouring and secondly, the acidity in the product etches the grout slightly, helping to make a better bond with the Grout Colourant.
Once the process was complete, I rinsed and dried the floor one more time and left it to dry off overnight.
Recolouring Grout
The next morning, I returned to colour and seal the grout with an Ivory Grout Colourant as selected by the customer. The process is quite straight forward and involves using a small brush to carefully apply the colorant along each grout line. When I was finished, I made sure to clean any excess product off the tiles before it had time to dry.
Finally, I buffed the floor with a fine white buffing pad, leaving the tiles looking clean and fresh, with the grout uniform. The customer was absolutely delighted with the service and the results.


We recommend using a specialist cleaning product such as Tile Doctor Neutral Tile Cleaner for the regular cleaning of sealed tiles. Never use a steam cleaner on a sealed Shower and if you wish to use another product always read the label in detail first, most supermarket tile cleaners are only suitable for Porcelain tiles as many are acidic and this will erode and reduce the life of the sealer over time.