Tiled

Porcelain Kitchen Grout Before and After Colouring in Leighton Buzzard

Restoring a Poorly Sealed Slate Kitchen Tiled Floor in Milton Keynes

Sealing is a fundamental part of any stone floor installation. If your builder or tiler hasn’t sealed your floor, he’s done something wrong – and it can cause significant problems. To the untrained eye, it may be difficult to tell whether a floor has been sealed, but you will quickly see that an unsealed floor attracts a lot of ingrained dirt and loses its lustre easily over time.

This was a problem for one of my recent customers, who lives in Milton Keynes in Buckinghamshire. They have a Slate tiled Kitchen floor which had been laid approximately 5 years prior, but had not been sealed properly on installation – and had not received any professional treatment since.

Consequently, the floor had become difficult for the customer to keep clean and it had lost its lustre and coloration due to ingrained dirt. Additionally, recent building works had left thick deposits of plaster on the tiles.

Slate Kitchen Floor Before Cleaning in Milton Keynes

Cleaning a Dirty Slate Tiled Kitchen

To begin restoring the Slate tiles, I applied Tile Doctor Pro-Clean, which is a powerful alkaline-based cleaner for natural stone. I mixed a strong dilution of the product, spread it liberally across the area and left it to dwell for 20 minutes to seep into the pores of the stone.

Next, I scrubbed it into the stone using a brush fitted to a heavy weight rotary machine, before rinsing the floor with a high-pressure water and wet extraction unit.

The next stage of the cleaning process was to get rid of the plaster deposits and some of the heavier stains. To deal with these I needed to apply an even stronger cleaner, known as NanoTech HBU (Heavy Build-Up Remover).

As its name suggests, the product uses nano-sized cleaning particles to penetrate beneath difficult stains to dissolve them and lift them out. I did this in combination with a steamer to help loosen up some of the plaster.

Sealing a Slate Tiled Kitchen

After allowing the floor to dry overnight, I returned to the property the next day to seal the tiles. I did this using five coats of Tile Doctor Seal and Go, which is a double-action sealer: not only does it provide a robust, topical seal, it also provides a durable low-sheen finish which is aesthetically pleasing.
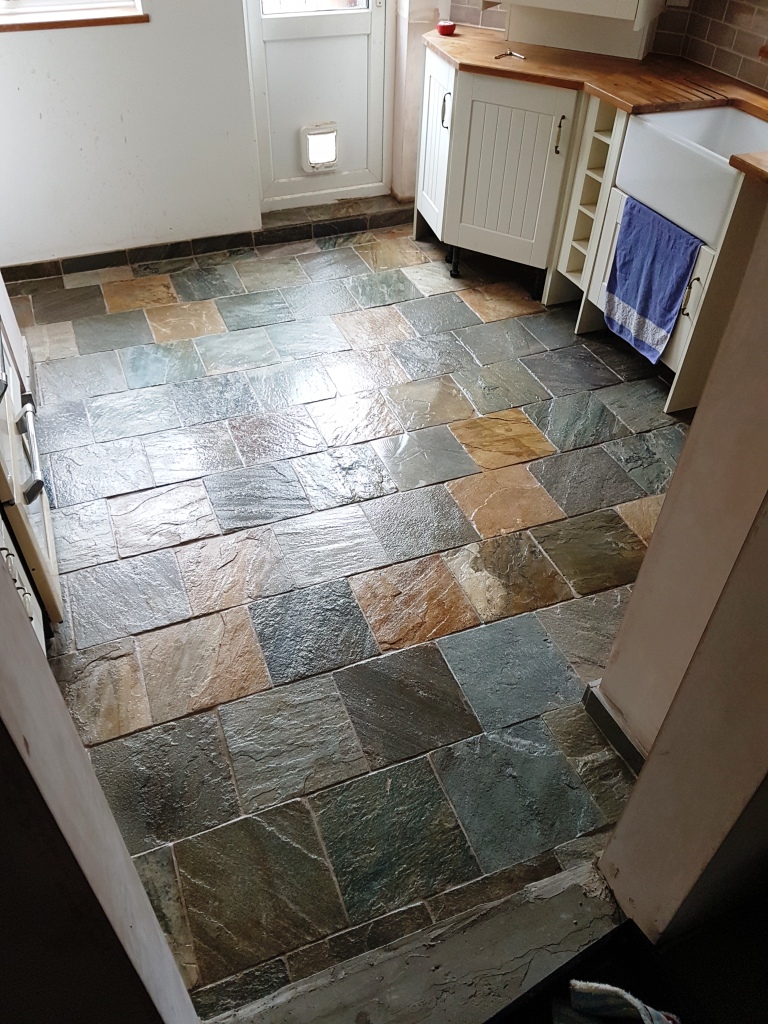
Slate Kitchen Floor After Cleaning in Milton Keynes
The sealer has done a fantastic job of emphasising all the natural colours in the Slate and the appearance of the entire floor has been lifted. The customer was really pleased with the restoration which certainly had been a long time coming.

Restoration of a Dirty and Stained Slate Tiled Kitchen Floor in Buckinghamshire

Restoring a Poorly Sealed Slate Kitchen Tiled Floor in Milton Keynes Read More »

Slate Kitchen Floor After Cleaning in Milton Keynes

Porcelain Tiled Kitchen and Hallway Refresh in Leighton Buzzard

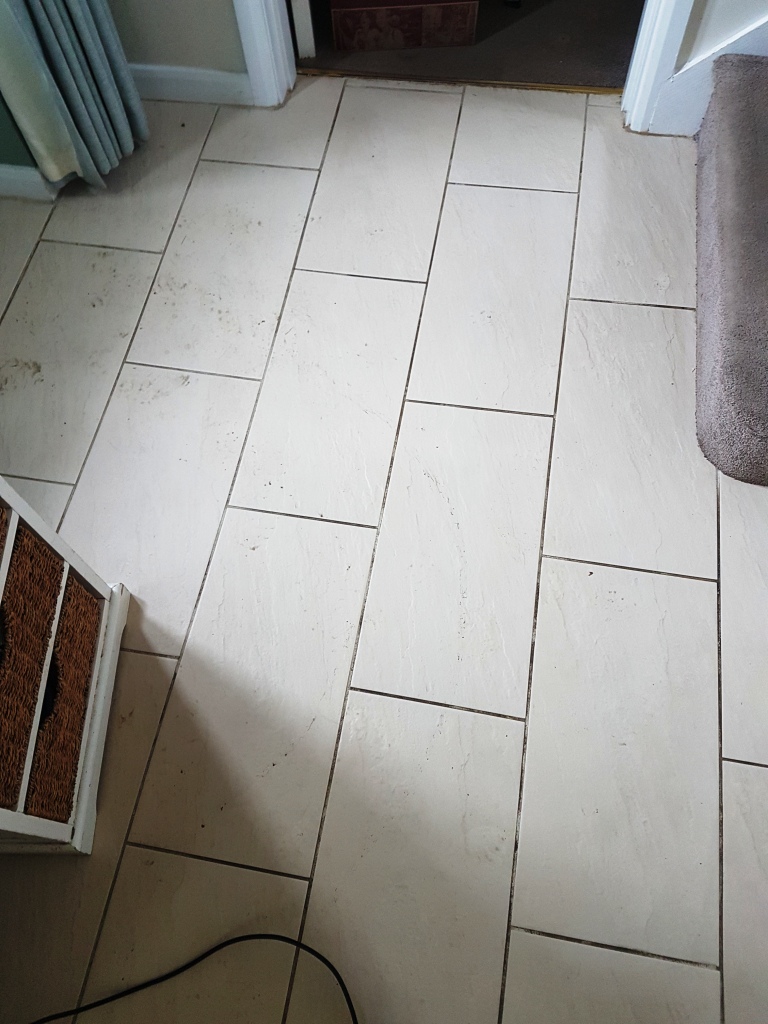
This Porcelain tiled floor had been laid in the hallway and kitchen of a house in Leighton Buzzard five to six years earlier. During that time the floor had become very dirty and the grout was discoloured to the point where it had turned black and no matter how hard the customer tried they were unable to get the grout clean.

On my initial visit to the property we discussed the options with the customer and decided that the best thing to do would be to thoroughly clean the grout and then seal it with grout colorant saving a messy and costly replacement of the grout.

Hallway Porcelian Tile and Grout Before Cleaning Leighton Buzzard

Cleaning Porcelain Tiles and Grout

To get the porcelain tiles clean and deal with the worst of the grout I treated the floor with a strong dilution of Tile Doctor Pro-Clean. The product was mopped onto the floor and then left to dwell for 20 minutes. It was then scrubbed into the tiles with a black pad fitted to a rotary machine running on a slow speed. I also ran a stiff grout brush along the grout lines to get the grout as clean as possible.

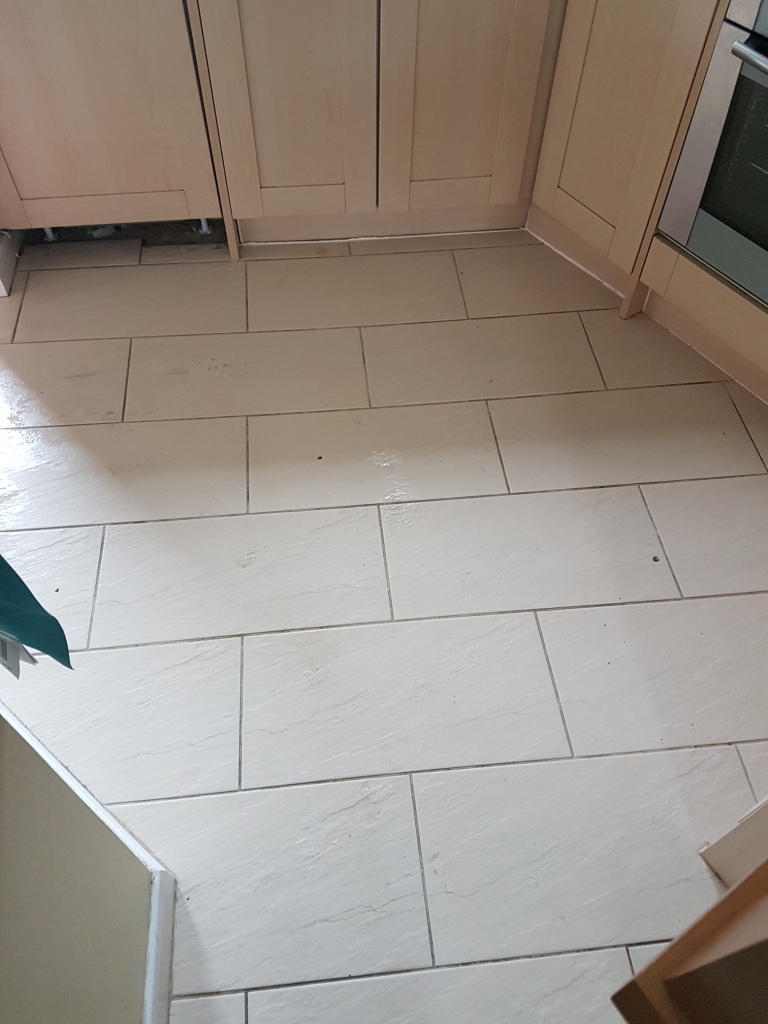
The floor was then rinsed with water under high pressure and the slurry extracted using a wet vacuum. As we were grout colouring later I gave the grout a further scrub using Grout Colourant Pre-Treater which ensures a better bond between the grout and the colourant, this was then rinsed off with more water and also extracted using the wet vacuum.

Kitchen Porcelain Tile and Grout After Cleaning Before Grout Colouring Leighton Buzzard

Re-Colouring Grout

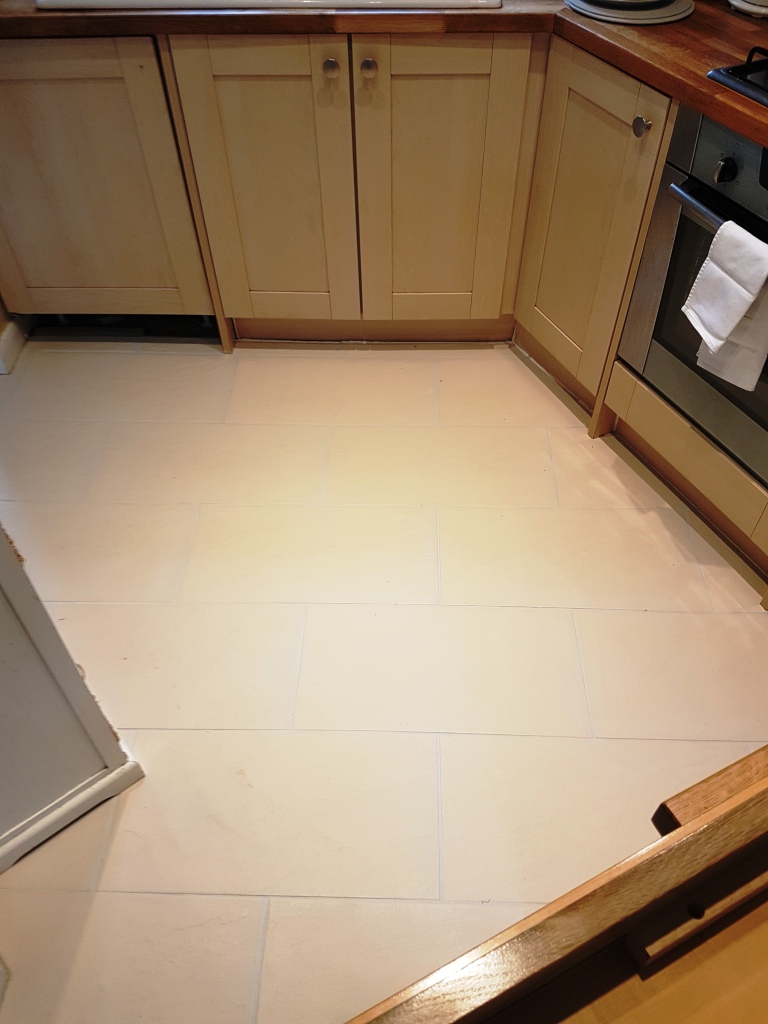
Once the grout was dry I started applying the Grout Colourant in a colour that best matched the original grout and colour of the tile. The process is quite straight forward and involves using a small brush to carefully apply the colorant along each grout line. When I was finished, I made sure to clean any excess product off the tiles before it had time to dry.

Kitchen Porcelain Tile and Grout After Cleaning and Grout Colouring Leighton Buzzard
My photographs probably don’t do the floor justice but hopefully you can appreciate how the grout is now uniform in colour and with the protection of the grout colourant which forms a barrier over the grout it will stay that way for a long time to come.

Restoring the Appearance of Porcelain Tile and Grout in Buckinghamshire

Porcelain Tiled Kitchen and Hallway Refresh in Leighton Buzzard Read More »

Scroll to Top